
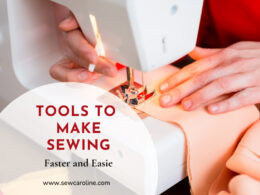
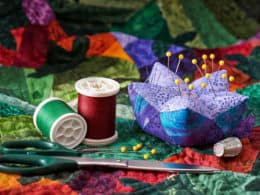
Every person who sews needs sewing tools. There are some essential tools for any skill level and type of sewing, like fabric scissors and pins. Different categories of sewing have unique tools for certain applications. While some of these aren’t “essential” sewing tools, they do serve to make sewing faster, easier, and more fun. Keep …
The Best 32 Sewing Stitches to Use in 2023
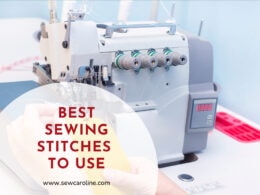
There are a lot of different sewing stitches to use on your project. Here I’ll show you what main stitches are available, and when best to use them. Most of the time when you are assembling a project, the straight stitch is used. However, certain fabrics (like ones with stretch) will require different stitches. There …
Top 12 Best Embroidery Machines For Beginners in 2023
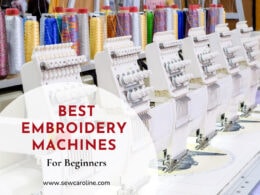
So you want an embroidery machine, but how do you choose the best embroidery machine for beginners? An embroidery machine can be a great machine for a sewer to have. It lets you monogram items to personalize them or add decorative features. Embroidery machines that have a USB port or other technology to add your …
Top 12 Best Embroidery Machines For Beginners in 2023Read More
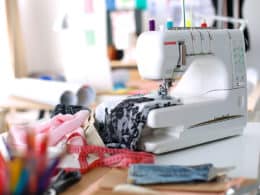
Top 15 Best Mechanical Sewing Machines and Reviews 2023
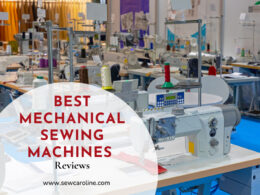
A mechanical sewing machine is built for durability. These machines have manual control knobs and levers. Mechanical sewing machines are an excellent choice for beginners or someone who does a lot of basic sewing. Sewing is a craft and with a mechanical machine, it is much easier to learn as it is straightforward and not …
Top 15 Best Mechanical Sewing Machines and Reviews 2023Read More
Best Sewing Machine Brands – The Complete List for 2023
When choosing a sewing machine to buy, there are lots of different brands to choose from. Some brands have been around longer than others, and some are known for specific types of machines or sewing. Here I’ll walk you through the major sewing machine brands on the market today to help you with your sewing …
Best Sewing Machine Brands – The Complete List for 2023Read More
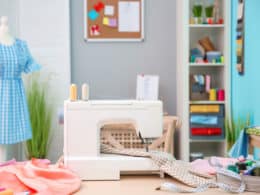
How To Use Sewing Machines: Beginner Guide For 2023
Do you have a sewing machine that you want to know how to use? Or maybe you want to buy one but have no idea how to even use sewing machines. You may want to learn how to use sewing machines so you can have a new useful skill. Once you know the basics of …
How To Use Sewing Machines: Beginner Guide For 2023Read More
15 Best Sewing Machines for Beginners Reviews 2023
You have decided to get yourself a new sewing machine, but what sewing machine is best for beginners? There are many different types, models and brands to choose from. When you are researching the various options of beginner sewing machines, there are a few things to keep in mind. What are you planning to sew …
12 Best Fabric Cutting Table Reviews 2023
Discovering the best fabric cutting table is crucial, as it is a focal point and essential piece of equipment for dressmakers, seamstresses, designers, craftsmen and hobbyists. It is important to choose a table that will offer stability as well as a cutting surface that will protect your fabric. It can be overwhelming but I am …
12 Best Sewing Threads Reviews 2023
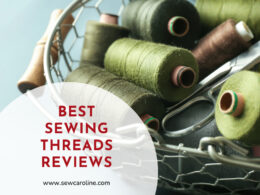
Whether you sew for you and your family or you have a small business, you know that a good sewing thread will impact the result of your work on every level. There are so many types and brands in the market that you may be confused as to which to choose. Before you choose one …
Top 16 Best Embroidery Threads Reviews 2023
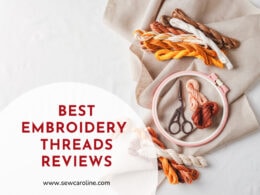
Today’s fashion industry is becoming more and more sophisticated and focused on offering ever finer pieces to a demanding customer. That’s where embroidery threads come in. Embroideries show off care for customers’ demands and attention to details not seen before. You surely wish to keep up with the latest trends and won’t want to be …
Top 10 Best Applique Sewing Machine To Buy 2023
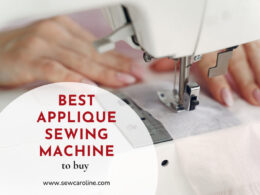
Embroidery is said to have originated in China around 30,000 BC. People have always enjoyed decorating their clothing and today is no exception. Here is a range of applique sewing machines from the basic stitch machines to advanced combination machines. I am going to give you the statistics on 10 of the best machines available …
Top 15 Best Pinking Shears Reviews 2023

The best pinking shears can prevent edge fray on fabrics and add more versatility to projects. They’re a must-have for serious and passionate crafters who chase precision. Although they’re not necessary for sewing, once you master the practice a little bit more, you will realize that a good pair of pinking shears can help you …
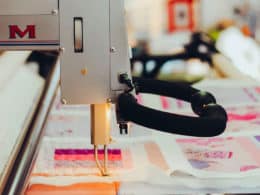
Top 15 Best Long Arm Quilting Machine Reviews 2023
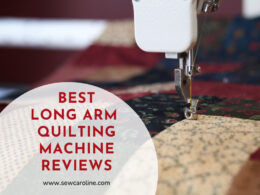
The best long arm quilting machine delivers a large throat space, advanced controls, and a strong motor. If you’re a passionate quilter, you’re probably searching for a long arm quilting machine. Although a long arm quilting machine costs a lot, it makes quilting a breeze. However, choosing the right model can be hard. Let’s review …
How To Set Up A Sewing Machine?

You don’t need to worry if you don’t know how to set up a sewing machine as I will instruct you immediately. You will understand installing principles of 2 main kinds of sewing machines and know specific steps for several other appliances. No matter what types of sewing machines you have, this post can help …
How Much Does An Embroidery Machine Cost?
How much does an embroidery machine cost is a regular question of almost all newbies in this field since you have to invest in a lot of materials to get an excellent item than you think. If you don’t prepare this knowledge, you probably have to drop it while embroidering process. In case you are …
How To Clean A Sewing Machine? – A Detailed Guide 2023
You think cleaning a sewing machine is quite complicated because you haven’t read how to clean a sewing machine yet. This article will provide you a detailed guide as well as tips when you tidy up your appliance. Besides, you need to know when you should clean it to maintain your device’s appearance and realize …
How To Clean A Sewing Machine? – A Detailed Guide 2023Read More
How To Sew A Kimono Jacket? A Detailed Guide You Should Not Miss!
Want to know how to sew your own unique kimono jacket? With this article, you can definitely make one with color, texture, and pattern to your liking. You will find in this post which tools you need to prepare and detailed steps on how to make a kimono jacket. I will also show you the …
How To Sew A Kimono Jacket? A Detailed Guide You Should Not Miss!Read More
How To Make A Faux Fur Vest? 7 DIY Steps To Save Your Money

Every girl wants a faux fur vest in her closet. Thus many have pondered about how to make one on their own. Also, compared to buying one, sewing a faux fur vest cost less money. But that comes with many problems: What materials are needed? How many steps does it take to make one? Are …
How To Make A Faux Fur Vest? 7 DIY Steps To Save Your MoneyRead More
How To Cut Fabric Straight? A 2023 Ultimate Instruction For Beginners
Learning how to cut fabric straight is one of the introductory lessons for everyone before getting more advanced sewing steps. However, that doesn’t mean making a straight cut is easy. There are tons of details that a beginner needs to pay attention to. It can be what tools to choose, what preparation to do, how …
How To Cut Fabric Straight? A 2023 Ultimate Instruction For BeginnersRead More
Top 15 Best Quilting Thimble Reviews 2023
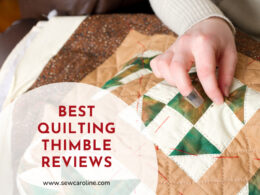
The best quilting thimble can make your life easier by protecting your fingers while pushing your needle while sewing. It’s a “must-have” tool for passionate quilters, sewers, and crafters. However, since they’re available in different sizes and materials, finding the right thimble for your needs can be hard. That’s where I kick in. Let’s review …
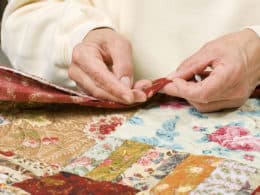
Top 15 Best Quilting Pins Reviews 2023
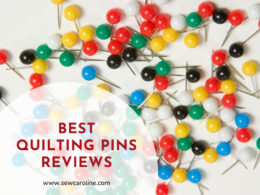
The best quilting pins will hold your material together for piecing, patchwork, and making crafts. They’re utilized for basting layers of material together when making a quilt as well. They’re important as they help you pin layers of materials and keep everything in place before you begin quilting. But picking the right pins can get …
Top 15 Best Quilting Rulers Reviews 2023
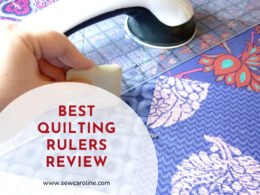
The best quilting rulers can make your quilting a lot easier, especially if you’re a beginner. You may feel a bit stressed by all of the tools you need to get started in the beginning. However, they will make your work a lot easier and give your projects a professional look in the future. If …
Top 15 Best Quilting Scissors Reviews 2023
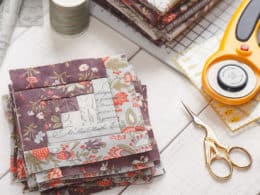
The best quilting scissors allow people to make precise cuts through a variety of fabrics. Both younger and older crafters deal with wrist and hand pain when cutting dense fabrics. This is where quilting scissors kick in. They help alleviate pain, cut through quilts and other fabric quickly, and provide the accuracy required for a …
Top 15 Best Quilting Frames Reviews 2023
The best quilting frames can help you speed up your future quilting projects. They’re incredible tools that act as a pair of helping hands to keep your quilt tight as you work. However, they’re made from different materials and come in different styles and dimensions. Let’s review some of the best-selling quilting frames and make …
Top 15 Best Mid Arm Quilting Machine Reviews 2023
The best mid-arm quilting machine is the perfect solution for individuals who don’t have enough coins or space to accommodate a long arm quilting machine. Therefore, if you want to improve your quilting skills and take your projects to the next level, purchase a mid-arm quilting machine. They cost between $5K and $10K. If you …
Top 15 Best Marking Pens for Quilting Reviews 2023

The best marking pens for quilting provide accurate results and come off easily. If you’re confused about which marking pen or tool to use, you’ve come to the right place! Avoid the common mistake quilters make when marking their quilts with permanent pens and keep your entire creation safe by choosing the right marking pens …
Top 15 Best Free Motion Quilting Books 2023
The best free motion quilting book can help you boost your projects and improve your quilting skills. The quilting world is huge and full of endless possibilities! If you’re interested in free-motion quilting, you have come to the right spot. Today, I will review some of the best-sellers you can buy and improve your projects. …
Top 15 Best Quilt Batting You Can Buy in 2023
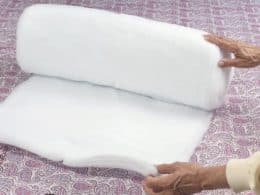
Choosing the best quilt batting for your quilt is one of the key decisions you will make during the process of making. The batting represents the unnoticeable, middle part of your quilt. Although it’s never seen on the surface, your finished quilt’s appearance, softness, and drape, all depend on the batting you utilized. That said, …
Top 15 Best Irons for Quilting Reviews 2023
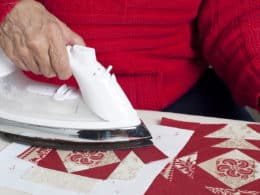
The best irons for quilting can help you put together different pieces of fabric with ease. The process can be time-consuming and painstaking. It requires a lot of planning and ironing. As your fabric becomes wrinkled, you will need to iron it and get a flat surface for your project. This can’t be done with …
Top 15 Best Thread for Quilting To Buy 2023
Quilting is one of the most inspiring and time-fulfilling crafts that you can experience. Picking patterns, colors and fabrics can be exciting. However, picking the right thread also matters! Always pick the thread according to your needs and project requirements. That said, let’s review some of the best quilting threads available and choose the right …
Top 15 Best Sewing Machines for Quilting To Buy 2023
Not everyone has the money or the space to accommodate a long arm quilting unit. They take up a lot of space and cost a lot. However, they can also negatively affect your well-being. You have to stand while completing your projects and push and pull a heavy machine head. Working like this all the …
Top 15 Best Sewing Machines for Quilting To Buy 2023Read More
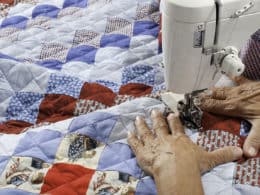
Top 15 Best Sewing Machines For Free-Motion Quilting 2023
Free-motion represents quilting with a standard sewing machine to stitch a quilt sandwich without the help of the feed dogs. It’s also known as “freestyle quilting” and “free-hand quilting”. Each term refers to quilting without a drawn pattern. If you’re interested in free-motion quilting, you’re probably also interested in purchasing the best sewing machine for …
Top 15 Best Sewing Machines For Free-Motion Quilting 2023Read More